Showing posts with label metalwork. Show all posts

Thursday, September 06, 2007

Wire wrapping... uh, the fifth?

Check the bottom photo for scale (until I add specific measurements for each item)


I keep confusing this one with the other stone w/ a curl...


Front view and side view. The interesting thing is that half the stone is translucent, and the layer between the opaque and translucent is a shiny purple.


The color is sort of akin to foil on the stone, not as much the veins on the other stones.


The iron-stone is oddly light colored, but the little splash of opal color is pretty entertaining.


Two shots of the front of this stone--it's pretty dark, but the color flecks are quite strong. This is the first stone I drilled, and thus far it is the only one that is not wrapped, but rather glued.


Boulder, with the clearest matrix thus far. It's stronger colored on the right, but the pattern is quite consistent on both sides. Drill-mounted wire (fairly minor).


This was probably the one that most caught my eye. I don't think I am too happy with how the wrapping came out, though it is good enough. The front/back are very similar, but the front is more domed. The thick vein runs fully though the stone, so it looks pretty brilliant when back-lit. The eye-loop is anchored via drill-hole (I couldn't justify wrapping across the thick vein!)


Oddly, this is probably the wrapping job I am most proud of, not just in this set, but so far (out of nearly 20 stones). The color of the opal itself is distinctly ... whelming. Neither over, nor under, just... whelming. It's a nice color, but the 3-D/translucent/"opal-y" characteristic is difficult to see.
The stone is very narrow (goes from 1mm to 2mm), fairly long (19mm), and very, very deep (7mm). Notes on construction: I drilled through the thin end of the stone, but the drill chipped the stone upon exiting, so I was left with a crater-ish thing on the left side. To mask/cover/camouflage the chipping, I made a small spiral to mount flush against the side, pulled the wire through and made some flourishes to make the eye-loop more interesting. Somehow this one just works so well aesthetically for me.


Line up, with scale.

Tuesday, August 28, 2007

Opal-related hijinks

I now have little display cases for them!
(I wanted to put the little "Australian Opal" stickers on the cases, but they would've obscured 75% of the lid...)

Actually, this entry was composed as rant, but I might as well tell you about some of the processes behind the wire-wrapped opals I've been posting.

I've been using 22 gauge, round sterling wire in half-hard temper. I do have some full-soft sterling in 0.6mm, marginally thinner than 22ga, and I will try some 0.5mm half-hard next.
I call these things "wire-wrapped" though there's not much wrapping--I'm mostly shaping the wires into a frame/cage for the stone, and that's done with pliers and hands.
Some of the chips I have are poorly finished, so I've acquired some 6000 and 8000 grit abrasives, and they've brought some chips to an acceptable polish. There are several stones, though, without the stereotypical opal "fire," though they are still beautifully iridescent. I think they're still worth wrapping, so I'll being doing that soon enough.

Most of the chips I haven't wrapped yet were just in need of a bit of shine, but I want to modify the shapes for
a few.
And here's the rant: there's one stone where I wanted to remove the burr that the cutter neglected to finish removing. The problem is that this stone is barely 3mm wide and 12mm long, so it's difficult to manipulate the little bugger. In any case, I managed to gash my finger pretty deeply while filing this thing. I dropped the stone and file and scooted to the sink to wash off the dirt. I've generally stopped using band-aids, so I had to superglue the cut (actually, I had to Zap-a-Gap the cut), use some tissue over the zapped gap, and bind the whole contrivance with sports tape. Now I'm having difficulty typing, much less manipulating jewelry... *Whines* Astoundingly, the cut didn't bleed at all, so I'm pretty thankful for that.

But I managed to misplace/drop/lose the stone during the chaos that was trying to get the cut sealed. It took me about an hour of rooting through my desk and environs before I found the damn thing. (It's conveniently the same color as my carpeting.) Meh. Frustrating thing is, I doubt this stone is going to look all that great, but with the amount of trouble I've gone through for this one (additional polish, burr filing, gash) it'd better be friggin' stunning.

Saturday, August 25, 2007

Wire Wrapping IV: The Saga Continues

I've run out of simple to wrap stones, so things get a little trippy right about now. We'll see how far I can get with the remaining stones.

Eye-to-tip: 1.6cm
This triangular stone shouldn't have been difficult, but part of the point decided not to cooperate, and I snapped
my first wire, so I had to scrap the original plan. And the triangular spiral? I think it was meant to balance out the mass of wires at the left, and to make the piece visually more complex.
This one is interesting--it looks pretty boring at first. The stone is a dark speckled brown, and there's a bit of gloss and not much else. Only at certain angles do the blue and green flecks show up. At most angles there's barely a hint of the flecks, and I had thought the stone was just poorly polished and therefore the flecks were clouded, but no, it's just a fickle stone.


Eye-to-tip: 1.6cm
Alright, this one was just obnoxious to work with.
The thickest part of the stone is barely 2mm, and most of the piece is 1mm, and the edges are tapered. I think I ended up crumbling 1/3rd of the blasted thing before I got the wrapping done. It's fully caged, but in a way different from the spiral cage several posts ago. This stone is a disc shape, and spiral wrapping would have left substantial lengths of wire with little support, so I had to come up with another way to protect the edges from chipping. Hence the bizarre bumper-rail-things. I wanted to be creative and make the cage a heart shape, but after the rock started crumbling a lot, I gave up and just followed the shape of the stone.

Wednesday, August 22, 2007

Wire wrapping, the third

Do we see a pattern in my posts?

The blue vein is pretty, though not as multi-hued and sparkly as some others. The pendant is just over 1cm, from eye to tip:


This one isn't a visually complex stone & wrapping, but I really like the flecks at the bottom point. Fullest width: 1.5cm. I like the subtlety & simplicity of this one:


OMFGSHINY. This one is really delicate, so I had to enclose all of it in wire, but I think the spiral works out fairly well. Eye-to-tip: 2cm. (I really like the uppermost vein--it's mostly nondescript till *Boom* = shiny.):


So the current line up (click for much larger view) is:

Monday, August 20, 2007

Wire Wrapping, part II

Silver wrapped Boulder Opal chips (Matrix Opal).
(Largest pendant, tip to tip: 2cm.)

And close ups!


Many of these veins are translucent. I attempt to demonstrate it by strongly back-lighting two of these stones:


Thursday, June 28, 2007

Remaining Stock!

Here's the chainmaille stuff I still have on hand! (Click on the images for large resolution)


All these bracelets (and one necklace) is in titanium, and the featured stones are all semi-precious gems (tiger's eye, jade, moss agate, etc.), pearls, cloisonne beads or silver-wrapped glass. Most of the clasps are magnetic.


These items are mostly copper, bronze or silver. The blue and silver band in the middle-ish is anodized aluminum.


S-t-r-e-e-e-e-t-c-h-y!
Neoprene and anodized aluminum construction make these items stretchy! The thing in the top right corner is a dice bag made from galvanized steel and anodized aluminum.


Sunday, March 11, 2007

ClawII: Vincent's left arm Redux

Vincent Valentine claw, from FFVII game character design. Mostly.
I'm rather determined to have the best Vincent costume ever. (My Vincent pwns yours. 'Specially that sparkly one. Really. WTF.)
Left arm, vambrace, articulated wrist, gauntlet. Click for larger resolution.
Story/details @ bottom of page.

Full view of claw vambrace & gauntlet

Closer look at gauntlet area


Demonstration of articulated joint


Moooonster energy drink (hence the 5am-ness)


For Otakon 2005 I cosplayed as Vincent Valentine.
The costume was a hybrid between the character design for the FFVII game and various info scrounged up for Advent Children and Dirge of Cerebus. The claw was borrowed almost entirely from the game design, but the clothes got upgraded to movie design. I also made the three barrel revolver (and a holster) to go with the mostly-movie-design costume. At the end of the convention, I sold the claw and gun, but kept the cloak & holster.
This spring break, I decided to re-create the claw. Curiously, I think my original was better made--I had a day or two in a machine shop in '05, so I was at a disadvantage for ClawII with just a drill and metal shears.

General construction information:
Vambrace, flared elbow-obstruction-thing, wrist and back-of-hand armor was all made of annealed aluminum. Pretty thick but really soft. Chicago screws for the articulated joint, and two-part rivets for the flare-to-vambrace fastening. There's some epoxy putty on the underside, mostly to cover the raw metal edge.
The glove is leather, previously with a cashmere lining. (I'd lost the other side, so I was fine with sacrificing the remaining one.) The plates on the gauntlet are made of polystyrene, thermo-formed on hand carved wood molds. The "rivets" are actually scrapbooking brads (which makes the inside of the glove a little uncomfortable, what with all the little bits of metal exposed).
The entire thing was spraypainted with Rustoleum's Hammered Finish Gold paint. I love the stuff--it's made to hide surface imperfections, so little scratches and nicks don't show, but it looks like an even finish. I tend to use it on all "metal" cosplay props I make. (Previous examples: ClawI and Movie-Van's lorica manica)
ClawI was constructed in pretty much the same way. I didn't change the design itself, but the details like the exact dimensions of the vambrace or elbow-obstructor weren't kept for ClawII. The materials and finish were the same.
Meanwhile: I do have ClawIII in the works. It'll be a claw based on the movie design. Similar materials, so far. (The scalloped gauntlet back was obnoxious to form by hand. Like "bend the metal into little ridges with no tools" obnoxious. I hope to find someone with tools that I can work with, 'else ClawIII isn't going to happen. I want it to be a well constructed claw, unlike ClawII.

Saturday, January 27, 2007

Stretchy chainmail et cetera


Top row: all byzantine weave
Second row: center item is spiral weave, side items are byzantine.
Third row: Two european 4-in-1 bands, 2 half-persian 3-in-1
(All the above listed items are in anodized aluminum and neoprene AND STRETCHY)
Bottom two rows: Half-persian 3-in-1 bracelets in anodized titanium w/ cloisonne center bead.
Thing between the euro bands and cloisonne bracelets: Half-persian 4-in-1 bracelet in anodized aluminum.

Tuesday, December 26, 2006

Chainmail Necklaces

(Click for a larger image)


From the top left, going clockwise:
-Byzantine weave with pink-lavender rosettes
-Eensy(TM) Byzantine weave with Iolite beads and dark blue-toned accents
-Green titanium Jends Pinds weave with tiny paper crane in a glass bulb
-Sterling silver spiral weave
-Sterling silver Half-Persian 4-in-1 weave
-Copper Half-Persian 4-in-1 weave


Medium-small crane in drop-bulb pendant. Wingspan: less than 1cm.

Chainmail Bracelets

(Click for larger image)

From far left, clockwise:
-3 Byzantine chains with rosettes (red, green and black) in aluminium
-Tiger's eye bead with titanium Byzantine chain (with gold-tone accents)
-Cloisonne bead with rose titanium Half-Persian 3-in-1 chain
-Sterling silver Half-Persian 4-in-1 bracelet
-Turqoise bead with titanium Byzantine chain (with green-tone accents)
-Jade bead with green and gold titanium Jends Pinds chain

Wednesday, May 24, 2006

Quick update: champaign flutes, metal rose, shirts

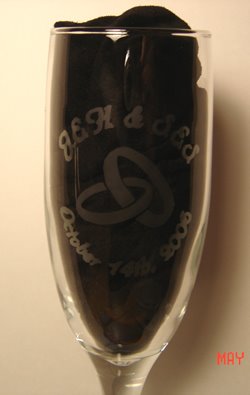
Pair of champagn flutes: one side with Bride and Groom The other side with initials, interlocked rings, and wedding date

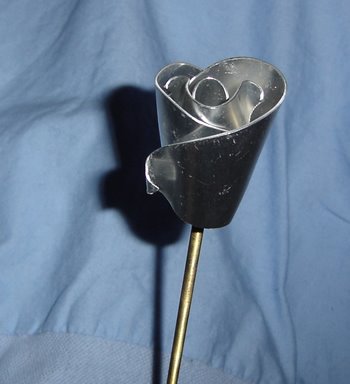
Aluminum rose: circular sheet aluminum, approx 18 ga. Brass threaded rod and steel nuts.
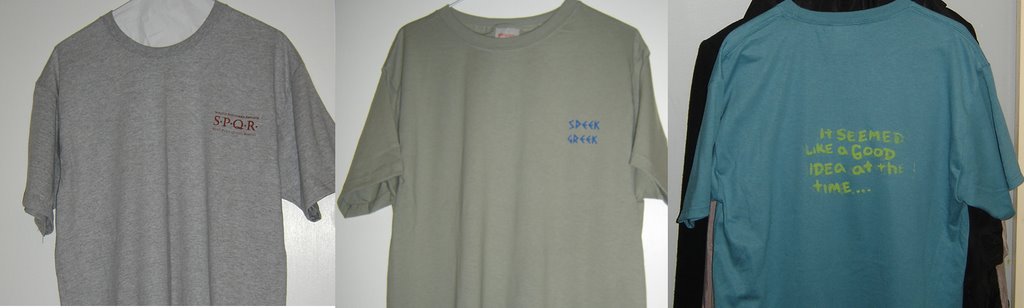
Three shirt logos:
And shots of the tshirts, for size approximation.
The SPQR shirt is a dark heather grey. The Greek shirt is a light dusty moss (I think it's called "willow") and the Good Idea shirt is a turquoise shade.

It's kind of hard to convey colors in an unlit room with lousy photography.

Monday, May 01, 2006

Paperclips & Nietzsche trump finals week


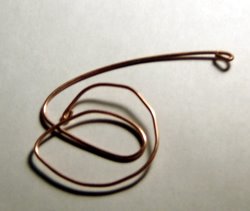
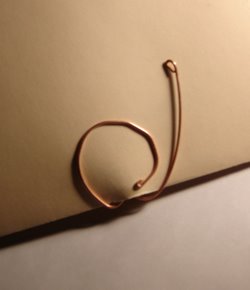
It's a paperclip, really.
I had a paper that was pretty long, since I had figures/images attatched. My fairly-heavy-duty stapler wimped out and couldn't staple the 23 pages. I searched the room for paperclips/binderclips/bulldogclips, but alas, found none. I've learnt from prior experience that sewing paper isn't going to work, not without special tools. I didn't have a 3 hole punch, and I didn't have any drill bits. And then I remembered I had plenty of wire. So: a study of desperate invention in copper 18g wire.

Here's a photo of it in action:

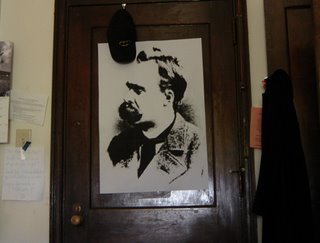
So I had an exam in an hour. What do I do? This: Rasterized Nietzsche image
(I didn't have a Superman hat, else that would've been in the photo too. 00bermensch!)

Closer:

Friday, March 31, 2006

Recycled wire musings

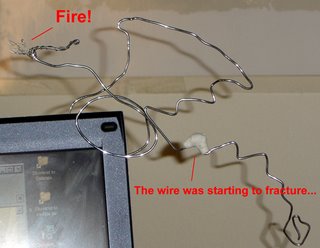
It's like a thought in wire form, sort of bounced around and then reformed into something new. Well, it's amusing, if not a musing. *Phhbt* I'm tired and my brain is mush.

Yeah, the explanatory details are needed.

18 gauge aluminum wire.
It used to be a Batman symbol, wire noose/balloon/invisible-dog-leash, and another dragon. (It's been through several reincarnations.)

Wednesday, February 15, 2006

Ockham's Straight Razor.


Numquam ponenda est pluritas sine necessitate.
"Entities are not to be multiplied without necessity."
A real straight razor with "Ockham" engraved on it. (Dremel & engraving bit and some creative set up. The little bugger is /sharp/.) This was made awhile ago, so it's not a recent creation.

Sunday, December 04, 2005

Silly hats & more!

It started out with a BSed-at-3am-in-the-dark prototype penguin cap.
Then I made a second, better penguin hat.
Then I realized that the hat base could be ... well, used as a hat base for stuff.
So I raided a fabric store for fleece and several hours later, I had hats.


We have, going clockwise: a penguin with flipper-earflaps, Roman Legionnaire helm with cheekplates that work as ear flaps, and Cthulhu-hat, complete with squiggly face and wings. (I haven't quite finished him, actually. A few hand sewing bits haven't happened yet. Also the eyes...)

Fun fact: it's my Nietzsche plushie doll that's wearing the penguin hat. You can see a little bit of his grey trousers under the left wing of Cthulhu.

(I discuss how I made these on Instructables)


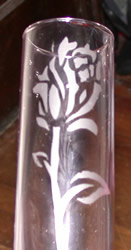
I had a few caffeinated drinks and now I'm running a dozen projects, most of them silly hats, but a few non-hat ones. Like the glass vase I etched. The thing is a single flower (or so) rose-plum tinted vase with (suprise!) a rose etched on it.

Sorry, the glare off the glass renders the design hard to see. But it seemed lonely and I didn't have any random flowers to put in the vase. But I did have alot of wire around. A few minutes with pliers and voila-- wire rose. It's really 3-D, so the photo just makes it look like a skeletal crumpled up tinfoil ball. Bah.

On the left is a close up of the flower portion of the etch. It's definitely a stylized image. I found a nice design that's meant to be a tattoo, stretched it, tweaked it and then etched it. I think I like it.

Friday, November 11, 2005

Retroactivity! WTFBuckle!

WTF is it?
It's a WTFBuckle!


Actually, it's a spoon + some wire acting as a buckle. I'll have to find some photos of it in action...

Thursday, November 10, 2005

I lied. Earrings > Sleep

Now I am going to sleep. After having made these:

Christmas Tree earrings!
Sterling (Argentium!) wire, anodized aluminum bells. (They most definitely jingle.)
Penny on card for scale. The trees area about 1.5".

Holiday Cheer~

Maybe I should make some wire turkey earrings before Thanksgiving...